I honestly can’t remember how I found OpenForge. It might’ve been through Twitter or one of the 3D-printing related YouTube channels I watch but none the less, I really like the idea behind the project.
OpenForge is at it’s core a set of “open source” – if you’ll allow me the use of the phrase – walls, floors, bases, doors, windows and many more assets that can be used to create locations and scenarios for your role-playing sessions.
In theory it’s as simple as pie; you download the asset you want and then print it on your 3D-printer. In reality it’s a lot more complex than that, hence this series of posts.
It’s not a given that I’ll ever completely figure out how to get to grips with OpenForge but I will be writing about it so if you feel like tagging along you’re more than welcome.
Options, as far as the eye can see
Devon Jones, the creator of OpenForge, is quite creative and productive. This manifests itself in five different types of sets; cut-stone (full and half height), dungeon stone, rough stone, ruined stone, and Tudor.
Each set contains assets of different shapes and sizes. I have yet to figure out if they all contain the same exact assets or if some sets are more complete than others. All sets have a number of bases, floor tiles, walls, windows and doors – and in some cases more than this. There’s also a set of plain bases to be used with any other set if you feel like it.
Each base has a corresponding floor or wall. What you need depends on the layout, with inner corners requiring one combination of walls and outer corners another combination, just to mention one example. Also, some walls have pegs that allows you to stack them.
In an effort to make OpenForge as compatible as possible with existing standards the bases comes in six different flavors depending on how you want to interlock your tiles. These flavors are Dragonlock, Infinitylock, Magnetic+Openlock, Topless Magnetic+Openlock, Triplex, and Topless Triplex.
Finally, as OpenForge has evolved over the years not all assets have been updated to the latest OpenForge standards. This is mostly indicated when you locate the assets on Thingiverse but it adds yet another layer of complexity.
Combine all of these options and you realize that there is ample opportunity to get lost, and at times I felt like just throwing in the towel.
I realize that I might sound overly negative so I want to point out that I truly appreciate the enormous effort that Devon is putting into this project. The amount of assets created is quite amazing and the last thing I want is for anyone to think that I’m not grateful for this. It’s just a bit much to take in, is all.
Putting it all together
As I write this I’m slowly figuring out how this is all meant to work – which is one of the reasons I’m writing this post to begin with.
The process of collecting the assets you need aren’t helped by the fact that tutorials, documentation, files and other much needed information is scattered between GitHub and Thingiverse. Unfortunately some of the documentation seems to be outdated or incomplete as well.
There is a tutorial but I didn’t really find it very helpful in explaining how everything is meant to fit together so here is my personal take on how to build an OpenForge collection.
Also, do not go to Thingiverse and start browsing the different collections of OpenForge assets – it will confuse the crap out of you.
1. Pick the style of set you want
One piece of advice Devon gives in the tutorial is to have many tiles for one set to give you flexibility, and then create a smaller amount of tiles from other sets to spice things up. He also mentions that cut-stone is meant to be “boring” as in “easy to mix and match with other sets.”
So, I’m going to start with cut-stone.
2. Pick the connection method you want
The way you connect your tiles depends on one thing, if you’re starting from scratch or if you’re adding to an existing collection.
If it’s the latter, pick the connection method that works with your existing collection, if you’re starting from scratch go with Magnetic+Openlock or Topless Magnetic+Openlock.
I’m going with Topless Magnetic+Openlock to make printing easier (see below for a render of this connection method).
3. Pick the base you need
Every set has their own bases in the specific style of that set. It’s up to you if you want to use the specific bases from that set or print the plain ones. I’ll be using the plain bases as I don’t care much about matching them with the style of the cut-stone set.
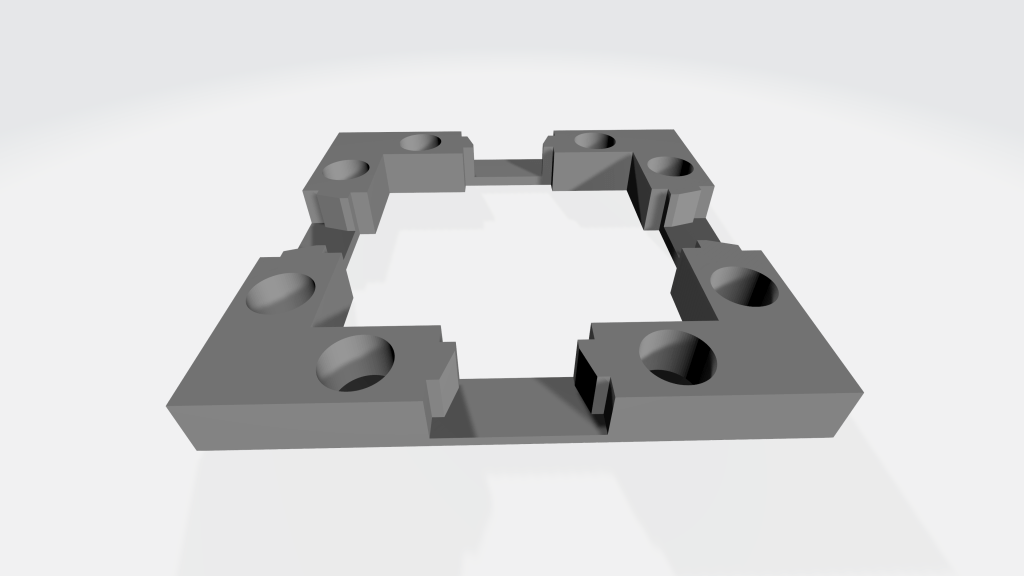
The render above is of the “E” base, which indicates the size of the base. There are multiple letters used to designate what size the base is, and also different letters for floor bases and wall bases. [2019-10-10: I've updated the table below to indicate that walls are only 0.5 inches wide, and to include the "EA" floor size.]
| Type of base | Tile size | Letter |
| Floor | 1 x 2 | S |
| Floor | 1 x 3 | SA |
| Floor | 1 x 4 | SB |
| Floor | 2 x 2 | E |
| Floor | 2 x 2 curved corner | F |
| Floor | 2 x 4 | R |
| Floor | 3 x 3 | EA |
| Floor | 4 x 4 | U |
| Wall | 0.5 x 1 | IA |
| Wall | 0.5 x 1.5 | BA |
| Wall | 0.5 x 2 | A |
| Wall | 0.5 x 2 x 2 curved corner | G |
| Wall | 0.5 x 4 | Q |
The “BA” wall is used in conjunction with an “A” wall to create an inner corner, hence the odd size. The “BA” base also has a mirror version because of it’s odd size.
The sizes above are multiples of one inch. For example, the “E” base I’m printing is two inches wide on both sides of the base. The reason I’m going with the “E” size is to allow for multiple minis to occupy the same space and still be able to reuse the tiles for different layouts.
4A. Pick the floor you want
If you’re printing a floor, simply pick the same size floor as the base, in my case “E”.
4B. Pick the wall you want
This where I struggle the most because of the incomplete and/or outdated information, a “fragmented” collection of assets and odd naming conventions.
There is a deprecated post on what sizes of walls to use in what situations that does a decent job of illustrating the various combinations, but being deprecated means it’s outdated. The problem is that as far as I can tell there isn’t an updated version to replace it. I’ll start working on a replacement and as soon as I have something that I think is 95% accurate I’ll release it.
For now I’ll just print an “A” base and wall, but there is no option to print a plain base for walls as far as I can tell so I’ll use the bespoke cut-stone base.
That’s it for now
This is as far I’ve come so far. The wall and it’s base are printing as I type this and will be done later tonight.
Hopefully this is of some use to some of you. There’s still quite a bit to go through, like corners (do I even need them?), windows, doors and other more unusual assets so I’m certain I’ll be revisiting this topic soon.
Feel free to post a comment below with corrections, questions, or just general feedback.
Thanks for reading!

One thought on “Getting to grips with OpenForge – part 1”