When we left off I wasn’t sure about corners – and I’m still not – but I’ve realized that I can’t rely on the old, deprecated walls to solve my problems. The “D” size wall that I printed only almost worked as it’s a couple of millimeters to narrow to line up with the other, up to date, walls.
Also, the “C” size wall I mentioned is replaced by an updated version, the “IA” wall with the corresponding base which I’ve printed over the weekend. It’s working as intended and aligns up perfectly with the other walls.
For now, I’m going to take the easy way out and not worry about “dead ends” and only build internal corners. In order to start or end a corridor it’ll either just be open, or have a door.
Maybe doors will be easier to understand?
For my purpose, to end a corridor or hallway, the doors I can find will work.
As you can see, the total size of the tile is the same as an “E” floor and the length of an “A” wall. But as soon as I want to integrate these into an existing wall, I run into the same problem as with corners – the doorway and the accompanying wall sits “inside” the floor. When printing separate floors and walls, the walls sit “outside” the floors.
At this point I should of course ask for help on reddit, facebook or on Thingiverse but I want to chronicle (pleased read that word in a rather pretentious voice) how easy or hard it is to get started with OpenForge based on the information at hand in the official tutorials.
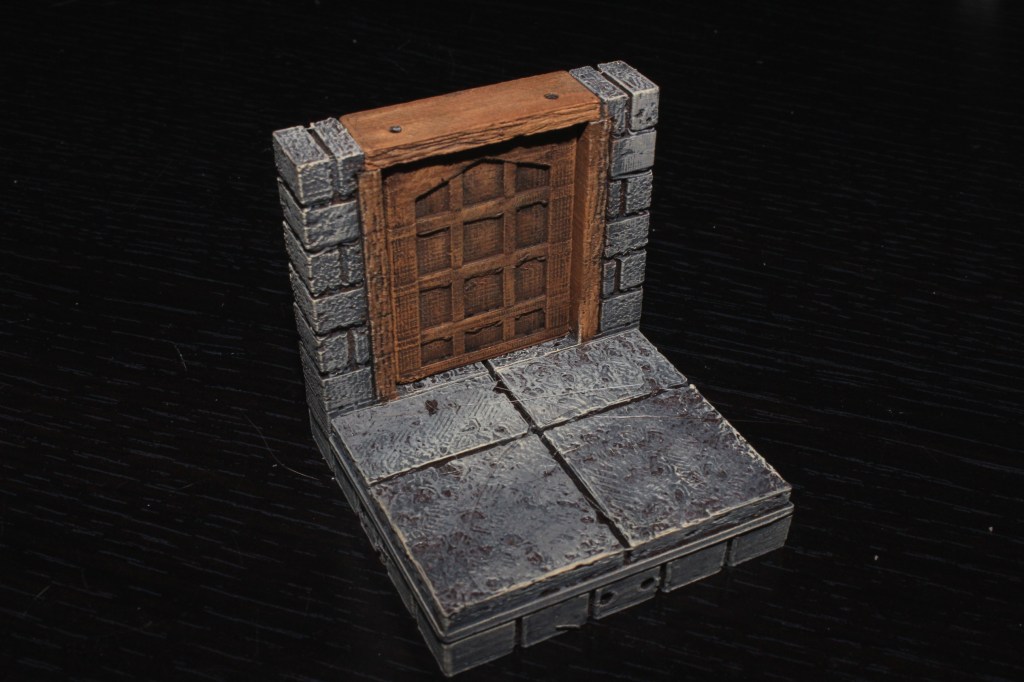
The “frankendoor”
My plan was to use an “A” wall base for the door frame in order to be able to place it “outside” of the floor and in line with the rest of the walls, but of course it’s more shallow compared to an ordinary wall.
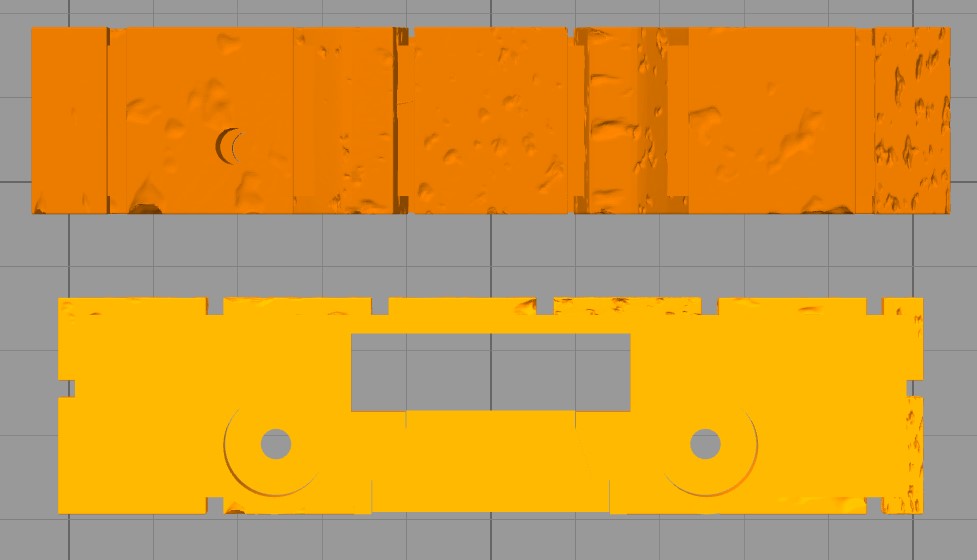
These are the same width, the difference stem from how Simplify3D displays the models.
I’m still going ahead with this idea, I don’t really care how well the door frame aligns with the base, it’s a small enough error that I can live with it. What bothers me though is that I seemingly have to hack together my own solution to what shouldn’t be a problem to begin with.
Right now my printer is busy for another couple of hours but I’ll try and get this tested tomorrow or overmorrow at the latest.
How about windows?
The same deal as with doors.
Down the rabbit hole
Right now I’m not even trying to follow any path in my writing, I’m just going wherever my “investigation” is taking me.
All the “unusable” assets like doors, windows and corners was quite old, from 2016 so I figured that they simply weren’t compatible with the floors due to being old but the floors are also updated in 2016.
Earlier in my journey I somehow stumbled upon a specific set of links, clicked on in a very precise order, that lead me to a recent set of assets – the so called “OpenForge 2.0 Cut Stone Separate Wall Primary Walls.”
I’ve spent the past 5 minutes trying to find any way to go from the tutorials to these assets but to no avail. Only by manually going through Devon’s latest work on Thingiverse was I able to find them again.
These assets are from Jun 24, 2019 and are described as “… a huge update of cut stone separate walls.” Despite this, the original “OpenForge 2.0 Cut Stone Wall” collection is the one linked to from the tutorial.
The sister collection to “OpenForge 2.0 Cut Stone Separate Wall Primary Walls.” is the “OpenForge 2.0 Cut Stone Separate Wall Primary Floors,” a name that makes very little sense. This has the same description as the “primary walls” collection. And it contains assets from the plain set.
Is there perhaps an update coming to the corners, doors, windows and other assets? It doesn’t seem like it as the latest creations from Devon are assets unrelated to this set, although still very much for OpenForge.
Also, while browsing through the multitude of pages, collections and instructions I noticed one important(?) thing about the scaling of the assets.
Initially all OpenForge tiles was based off of 25 mm squares but has since been updated to 1 inch (~2.54 mm) squares. There is confusing (and perhaps even conflicting?) information about this though.
On a number of Thingiverse collections the following instructions are attached: “The tiles are in inch square basis (which matches most commercial printed tiles). If you want that size, print without changes, and print one of the inch bases. If you instead want 25mm squares (The historical scale of OpenForge), scale the floors on X and Y or walls on X, Y and Z by 98.4% and print one of the 25mm bases. “
In the introduction to the OpenForge sets, on GitHub, linked to from the main tutorial, we read this: “OpenForge internal tiles and dwarven forge are based on 25mm squares. Printable Scenery, Dragonlock and Hirstarts are based on 1″ squares. To make the 25mm tiles the 1″ scale, scale them up to 101.6%. To do the reverse, scale 1″ tiles down to 98.4%. however, the OpenForge bases are already the right size. DO NOT SCALE THEM, as it will break the openlock connectors.“
Which is it? I’m simply printing them as-is and they come out as multiples of inches so at least the assets I’ve printed so far are correct but the text doesn’t make this obvious.
That’s it for the moment
I will keep printing and (soon enough) painting as many OpenForge assets as I can and need. The system has – as I’ve mentioned before – huge potential and there are many, many assets that absolutely will enhance a gaming session.
There is however clearly much work needed when it comes to managing the actual project, especially in regards to information and asset management. Right now it’s, as I’ve tried to illustrate, extremely confusing to figure out what to print and how if you just want a basic starter set.
I’m almost done with my first iteration of the wall and floor size guide but I just want to make sure that I’m not missing anything obvious before releasing it.
Thanks for reading.

One thought on “Getting to grips with OpenForge – part 3”